Hey everyone! Today, we had an exciting Linux installation session at our college. We expected many to do a full Linux installation, but instead, we set up dual boot on 10+ machines!
Topics Covered: Syed Jafer – FOSS, GLUGs, and open-source communities Salman – Why FOSS matters & Linux Commands Dhanasekar – Linux and DevOps Guhan – GNU and free software
Challenges We Faced
BitLocker Encryption – Had to disable BitLocker on some laptops BIOS/UEFI Problems – Secure Boot, boot order changes needed GRUB Issues – Windows not showing up, required boot-repair
****Check boxes with 2 option below: (You can tick this check boxes)
i. Use admin privileges when installing py.exe
ii. Admin python.exe to PATH
*Then Choose Customize installation and all checkboxes can be selected. (as per your requirement)
Click Next
* Shows Advanced Options
i. Install Python 3.12 for all users
ii. Associate file with Python (requires the 'py" launcher)
iii. Create shortcuts for installed applications
iv. Precompile standard library
v. Download debugging symbols
vi. Download debug binaries(requires VS 2017 or later)
**Check box can be selected from i to v
Customize install location
By default it shows C.// drive (Keep as it is)
**Then it asks for Do you want to install on your device Click Yes. Shows Setup Progress
6.After successful installation it shows "Setup was successful".
Then click Close.
To verify python installed on machine or not:
Go to cmd / Command Prompt on your device
Once opened it shows as eg: C:\Users\Dev>
i. Type: python --version (example C:\Users\Dev>python --version)
ii. Shows output as below:
Python 3.12.4
If the above current version you installed shows its successfully installed.
To check for py shell
i. Type py (example C:\Users\Dev>py)
ii. Shows as below:
Python 3.12.4 (tags/v3.12.4:8e8a4ba, Jun 6 2024, 19:30:16) [MSC v.1940 64 bit (AMD64)] on win32
Type "help", "copyright", "credits" or "license" for more information.
iii. Then type what you need, example:
print("My first blog about python installation on windows....")
My first blog about python installation on windows....
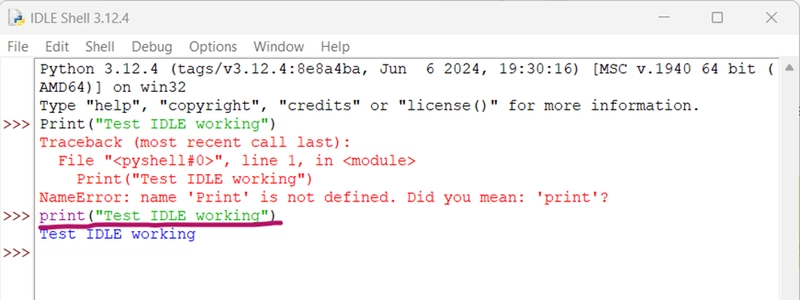
*****To check IDLE: Search on your device idle*
(IDLE is Python's Integrated Development and Learning Environment, its free open source from python itself)
Shows IDLE (Python 3.12.4 APP) Open it new window gets opened as IDLE Shell 3.12.4
As below:
Python 3.12.4 (tags/v3.12.4:8e8a4ba, Jun 6 2024, 19:30:16) [MSC v.1940 64 bit (AMD64)] on win32
Type "help", "copyright", "credits" or "license()" for more information.
Here also you can type and check:
print("My first blog about python installation on windows....")
It shows as output below:
My first blog about python installation on windows....
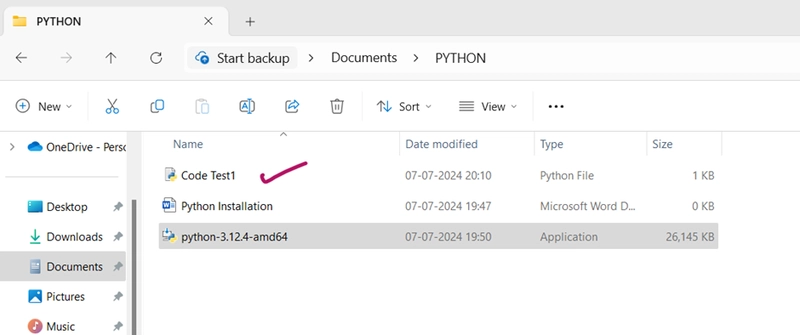
You can also save your file:
File-->Save As and save with file name eg: demo. Automatically it gets saved as demo.py
You can open the file Notepad/Notepad++ editor to check it.
SSH, also known as Secure Shell or Secure Socket Shell, is a network protocol that gives users, particularly system administrators, a secure way to access a computer over an unsecured network.
By default SSH is installed in linux.We can check the version by using this below command.
ssh -V
Otherwise we can install it by..,
sudo apt install openssh-server openssh-client
sudo systemctl status ssh
Also we can check the status of SSH.The default Port Number assigned by ssh is 22.We can change it in the configuration file also we can allow or deny users or groups and Alive Interval in the configuration file. NOTE : Restart the ssh after configured.
nano /etc/ssh/sshd_config
AllowUsers user_name AllowGroups group_name
To allow permissions to specific users and groups to access ssh.
DenyUsers user_name DenyGroups group_name
To deny the permission to specific users and groups.
LoginGraceTime specify_time
(i.e) 1m ==> 1 minute. If a user can’t make a successful login with the specific time,it will not allow the user to enter into the remote machine.
ClientAliveInterval 600 ClientAliveCountMax 0 ==> Default it is zero.
(i.e) 600 ==> 600 seconds = 10 minutes. The tunnel will break after the mentioned time (600 seconds) if there is no actions were performed by the user in the server.
NOTE: Restart the service once changes are made in configuration file.
scp -P specific_port_number user_name@hostname:/path_of_the_file/file /path_to_copy_in_local_system ===> For using Port Number other than 22.
Example : scp student@ip_address:/home/student/Checking_scp_command/Remote_to_Local.txt /home/g/Downloads/ scp -P 2027 student@ip_address:/home/student/Checking_scp_command/Remote_to_Local.txt /home/g/Downloads/
In this command,we are going to get the file from remote server to our local system.
NOTE:
There is a command called “ssh-keygen” which generates a unique key for accessing the remote server via local system. This never ask passwords to enter into the system,But be careful of handling this key.If you are not familiar with this method,just practice with the password type few times. Keygen will be discussed later in our next post.Stay tuned…
Let us know how to install wordpress in debian linux with the command line. First,we need to create a database for a new user mainly for wordpress in mariadb. Start the Apache server and mariadb service.Switch into mariadb then create a new user,which is already we discussed in mariadb installation.
I created a unique Database named “database_wordpress” specially for wordpress,also i created a new user.
You have successfully installed wordpress,by checking it open a browser and pass the url as “localhost” it will displays the wordpress page containing language selection dropdown.
That’s it… Start publishing your thoughts to the world..!
First of all,we need to update the package manager and then type the install command.
Here we are going to install two packages i.e.., for server side and client side.You can skip the “mariadb-client” if you don’t need.
sudo systemctl status mariadb.service
Using this command,we can check the status of mariadb.Refer the image.
Now,we successfully done with the installation.After this we need to set a password to the root user.Because,by default the root user doesn’t have any password.So,we need to use this command..,
sudo mysql_secure_installation
Simply,press enter and then press ‘N’ next press ‘Y’ for further steps.
Also,you can create a new user.Let’s see how to create a new user.
CREATE USER 'your_username'@'localhost' IDENTIFIED BY 'your_password';
GRANT ALL PRIVILEGES ON *.* TO 'your_username'@'localhost' WITH GRANT OPTION;
Here,we are going to discuss about how to install apache server in debian.
sudo apt update
sudo apt install apache2
Once,the packages are installed in your system.Run the server by the following command.
sudo systemctl start apache2
Now you can check the status whether it is running or not by using..,
sudo systemctl status apache2
Active: active (running) since Thu 2024-02-08 18:37:49 IST; 11s ago You can check that it is running.Also there is a another method to check by entering http://localhost/ in any of your browser.
sudo systemctl enable apache2
If you don’t want to start every time and by default the server should be on running,use the above command.It starts automatically when the system boots.
sudo systemctl stop apache2
This command will stop the server.
sudo systemctl disable apache2
This will disable the server and is not running after the system boots.
Now,we can see how to remove apache server.
sudo apt remove --purge apache2
This will remove the apache2 server from your system.
sudo apt autoremove
This command is used to remove the apache related dependencies automatically from the system.