AI in the Clinical Arena: Llama 4 Scout vs Claude 3.7 Statistical Showdown
Introduction
As artificial intelligence advances, there is growing interest in evaluating how different AI models perform in specialized domains like clinical trial statistics. This article compares two state-of-the-art large language models — Llama 4 Scout Reasoning and Claude 3.7 — on their ability to solve common statistical problems in clinical trials. It’s important to emphasize that this study examines only a limited set of three clinical trial problems and should not be interpreted as a comprehensive assessment of these models’ overall capabilities.
Llama 4 Scout Instruct Model

Claude 3.7
Problem Selection
Three foundational clinical trial statistical problems were selected to evaluate the models:
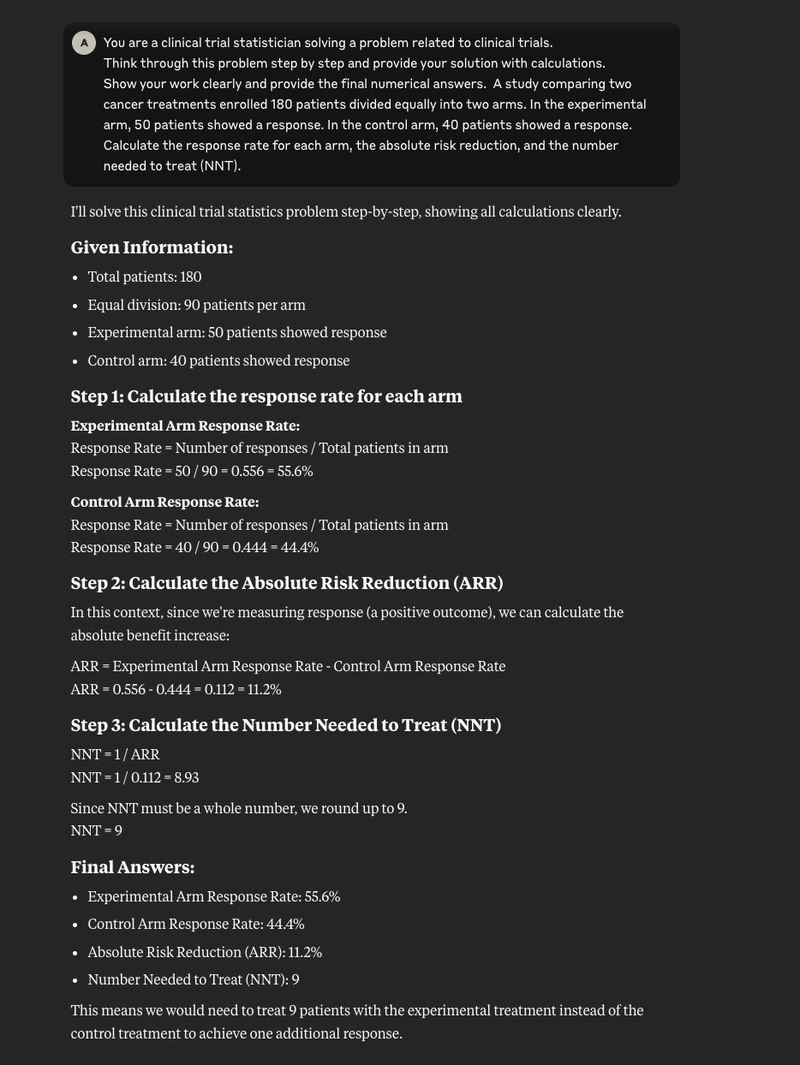
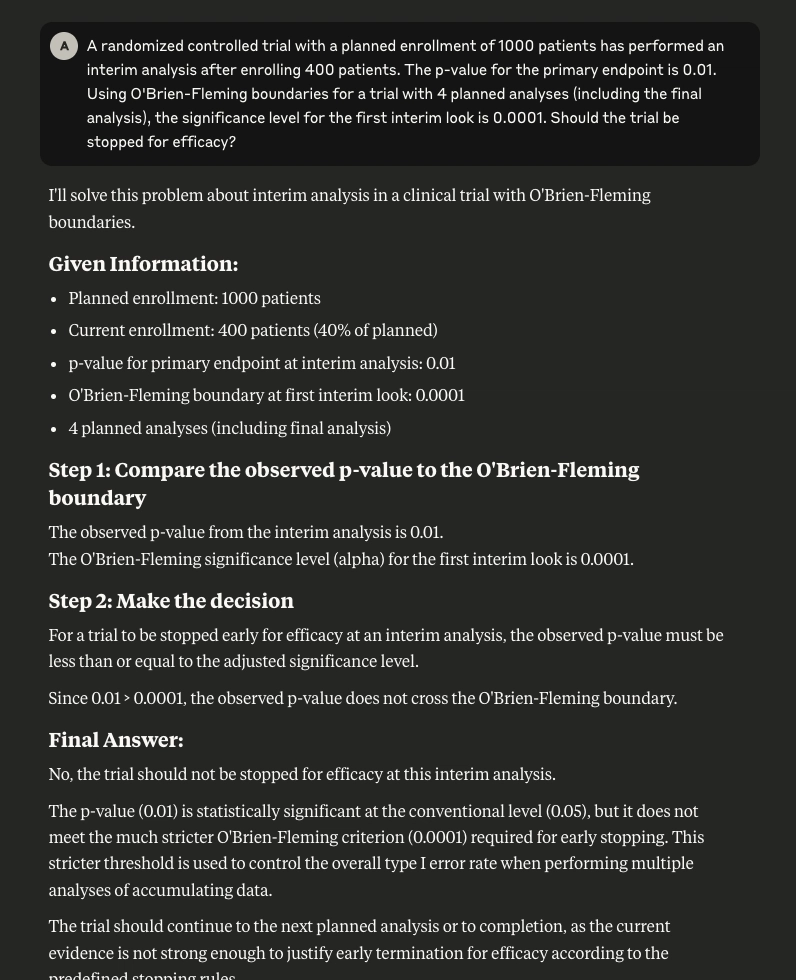
Treatment Effect Analysis: Calculating response rates, absolute risk reduction (ARR), and number needed to treat (NNT) in a cancer treatment study comparing experimental and control arms
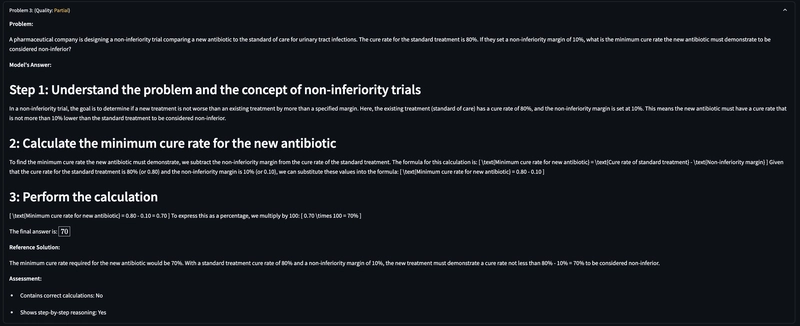
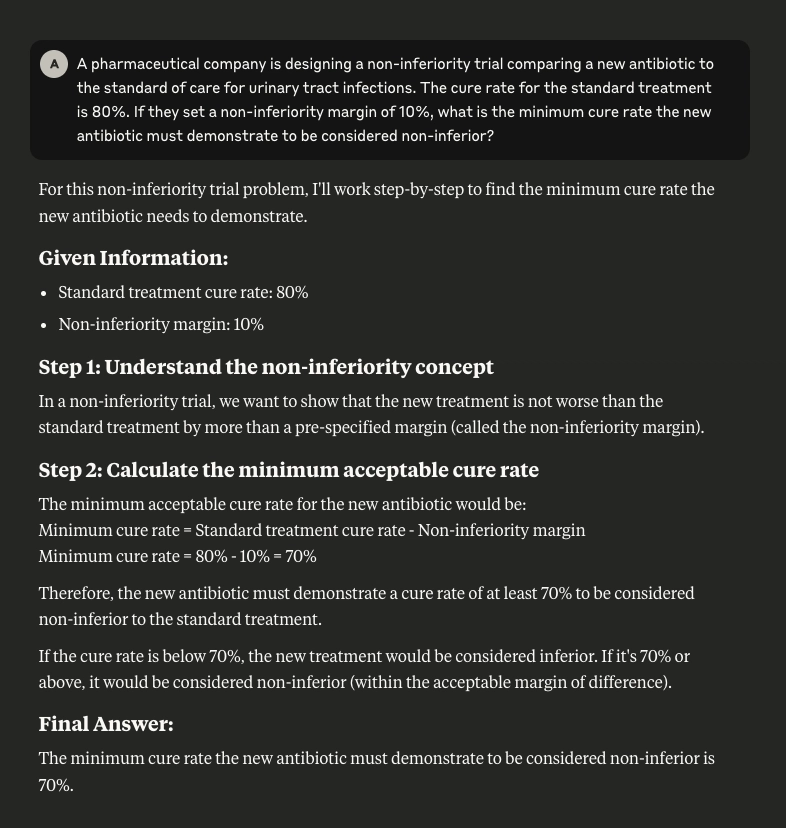
Non-inferiority Trial Design: Determining the minimum cure rate required for a new antibiotic to be considered non-inferior to the standard of care
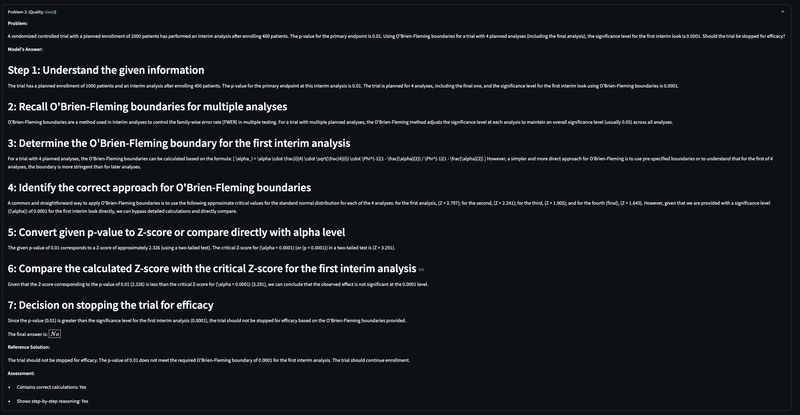
Interim Analysis Decision-Making: Applying O’Brien-Fleming boundaries to decide whether to stop a trial early based on interim results
Evaluation Criteria
The outputs from both models were compared across several dimensions:
- Mathematical accuracy
- Statistical reasoning approach
- Clarity of explanation
- Contextual understanding
- Presentation format
- Result interpretation
Detailed Findings
Mathematical Precision
Both models demonstrated excellent mathematical precision, arriving at identical numerical answers for all three problems:
- In Problem 1, both correctly calculated the response rates (55.6% vs 44.4%), ARR (11.2%), and NNT (9)
- In Problem 2, both determined the minimum acceptable cure rate to be 70%
- In Problem 3, both correctly concluded that the trial should not be stopped based on the interim analysis
Approach to Statistical Reasoning
Llama 4 Scout Reasoning
Llama 4 Scout approached problems with a highly structured methodology:
- Began by clearly organizing given information in bulleted lists
- Used explicit section headings to demarcate reasoning steps
- Provided direct formula applications with clear variable substitutions
- Included practical interpretations of the final statistical outcomes
Claude 3.7
Claude 3.7 demonstrated a more narrative reasoning style:
- Used numbered steps with detailed explanations before formula application
- Provided more extensive context about the statistical principles being applied
- Explained the reasoning behind formula selection
- Included additional interpretation of why certain approaches were appropriate
Explanation Quality
The models differed somewhat in their explanatory approaches:
Llama 4 Scout Reasoning
- Provided concise but complete explanations
- Excellent at clarifying practical implications (e.g., “This means we would need to treat 9 patients with the experimental treatment instead of the control treatment to achieve one additional response”)
- Included additional context about threshold interpretations
-
Explicit about Type I error control in the interim analysis problem
Claude 3.7
Offered more detailed contextual explanations of statistical concepts
Provided more extensive rationale for calculation approaches
Explained why certain statistical formulas were appropriate in each context
Included more discussion of underlying statistical principles (e.g., family-wise error rate)
Visual Presentation
The models showed distinct presentation styles:
Llama 4 Scout Reasoning
- More visually structured with effective use of bulleted lists
- Clear section labeling and organization
- Highlighted key information more prominently
- More consistent formatting throughout responses
Claude 3.7
- More narrative in style with detailed steps
- Used numbered steps with explanatory headings
- Integrated formulas within explanatory text
- Maintained professional presentation but with less visual structuring
Discussion
Complementary Strengths
This comparative analysis revealed that both models possess strong capabilities in clinical trial statistical reasoning but with slightly different emphases:
- Llama 4 Scout Reasoning excelled in structural organization, practical interpretation, and concise presentation of statistical concepts
- Claude 3.7 demonstrated particular strength in contextual explanation, statistical rationale, and discussion of underlying principles.
Practical Implications
For professionals working in clinical trial statistics, the choice between these models might depend on specific needs:
- For quick statistical calculations with a clear structure: Llama 4 Scout Reasoning’s concise and well-organized approach might be preferred.
- Claude 3.7’s more detailed explanations might offer more excellent educational value for a deeper understanding of statistical principles.
However, the mathematical precision demonstrated by both models suggests that either would be reliable for calculating vital clinical trial statistics.
Comparing Llama 4 Scout Reasoning vs Claude 3.7 in Clinical Trial Problem Solving
Comparing Llama 4 Scout Reasoning vs Claude 3.5 in Clinical Trial Problem Solving
| Aspect | Llama 4 Scout Reasoning | Claude 3.5 |
|---|---|---|
| Information Organization | Used bulleted lists to highlight given information | Presented information in numbered steps with headings |
| Structure | Clear section headings with step numbers | Numbered steps with detailed headings |
| Problem 1: Response Rates | ||
| Experimental arm rate | 55.6% | 55.6% |
| Control arm rate | 44.4% | 44.4% |
| ARR calculation | 0.556 - 0.444 = 0.112 = 11.2% | 55.6% - 44.4% = 11.2% |
| NNT calculation | 1/0.112 = 8.93 → 9 | 1/0.112 = 9 |
| Additional context | Explained meaning of NNT (9 patients for one additional response) | Provided explanation of why ARR used experimental minus control |
| Problem 2: Non-inferiority Trial | ||
| Concept explanation | Concise explanation of non-inferiority concept | More detailed explanation of non-inferiority margin |
| Calculation approach | Direct formula application | Step-by-step explanation with formula justification |
| Final answer | 70% | 70% |
| Additional explanation | Added what happens if cure rate is below/above threshold | Included context about the meaning of non-inferiority margin |
| Problem 3: O'Brien-Fleming Boundaries | ||
| Decision framework | Clear comparison of p-value to boundary | Detailed explanation of boundary concept |
| Decision logic | p-value (0.01) > boundary (0.0001) → don't stop | Same conclusion with more contextual explanation |
| Additional explanation | Included explanation of Type I error control | Discussed family-wise error rate control |
| Overall Characteristics | ||
| Formatting style | More visually structured with bulleted lists | More narrative with detailed steps |
| Mathematical accuracy | Identical answers across all problems | Identical answers across all problems |
| Result interpretation | More explicit interpretation of final results | More context on the statistical principles |
| Explanation depth | Concise but complete | More detailed statistical context |
Conclusion
This limited comparison suggests that Llama 4 Scout Reasoning and Claude 3.7 demonstrate strong capabilities in solving clinical trial statistical problems. However, Llama 4 Scout is open-source, and you can fine-tune it with your data, which will be more powerful.
It’s worth emphasizing that this analysis is based on only three specific problems and should not be extrapolated to represent overall model capabilities across the broad and complex domain of clinical trial statistics. A more comprehensive evaluation would require testing across a broader range of problem types, complexity levels, and specialized statistical methods used in clinical trials.